Pages

Showing posts with label Chicken. Show all posts

Friday, December 4, 2015

Pesto Chicken ~ 21 Day Fix Approved!

I recently purchased the 21 Day Fix cookbook, Fixate and I am loving it! There are so many great ideas for healthy meals, snacks and drinks--101 to be exact! I have been working through each recipe one at at time!

One of my favorite is this super simple Caprace Pesto Chicken!

Basically 5 ingredients and if you wanted add add arugula or mixed greens to it, that's 6 :) Super easy, super simple, super healthy!

Pesto Chicken
Serves 2

2 bonesless, skinless chicken breasts (i like to pound mine out thin, so they cook faster)
1 large tomato, sliced
2 tablespoons store bought pesto sauce (look for one with the FEWEST ingredients possible!)
4 slices fresh mozzarella
1 teaspoon olive oil
Salt/pepper to taste

1. Season chicken with salt and pepper.
2. Heat oil in a large skillet and cook chicken 3-4 minutes per side until cooked through.
3. Place chicken on a plate and top each piece with 2 slices of tomato, 1 tablespoon pesto
and 2 slices of fresh mozzarella.
**at this point, you can put the chicken on a cookie sheet and place it under the broiler for a minute or two so the cheese will melt, but it's not necessary.

21 Day Fix Containers (per serving): 1/2 green, 1 red, 1 blue, 1 teaspoon

We had this chicken with a side arugula dressed with lemon juice and a glass of wine. I was FULL afterwards let me tell you! So yummy!

If you want more healthy, 21 Day Fix approved recipes, you can follow my board on Pinterest HERE.


Don't forget to follow A Little Bit of Cheer on Facebook HERE

Follow me on Instagram HERE

Follow any of my boards on Pinterest HERE 

Follow me on Bloglovin' HERE  

See where I link up HERE

 photo http___signaturesmylivesignaturecom_54493_88_9CE8AA3F49A05E87EC0C8AFE42F0194E_zps6da736d6.png

Friday, August 28, 2015

Foodie Friday ~ Chicken & Asparagus Pasta


Alrighty girls--you all need to make this pasta dish, pronto!! Before it's too late to get good asparagus!! Asparagus has peeked but it's definitely still possible to get a few good bunches!!

I came up with this recipe with no real direction besides the fact that I know I wanted pasta, I wanted something on the light side and I had just picked up this gorgeous bunch of asparagus at a local farmstand. So I created this dish not know AT ALL how it would turn out and boy, was it a hit!!!

The sauce is light, but the Parmesan makes it creamy and delicious! The touch of lemon you add at the end is just perfect!


Chicken & Asparagus Pasta
** Serves 2-3

1 chicken breast
1 bunch of asparagus, cut into bite sized pieces
3 cloves garlic, minced
1 cup chicken stock
2 tablespoon flour
1/2 cup milk (i used whole milk, you can also use low fat or half and half)
1 cup grated Parmesan cheese
Juice and zest of one lemon
About 3/4 of a box of "fun shaped pasta" (i used Campanelle)
Red pepper flakes (optional)

1. Season chicken with salt and pepper. In a large skillet cook chicken in a little olive oil about 5-6 minutes per side until cooked through. Set aside to cool, then cut into bite sized pieces.

2. Cook pasta according to the package directions. Whisk

3. In the skillet you used to cook the chicken, add a little more olive oil, then saute garlic for about a minute until fragrant. Add asparagus and cook until still crisp.

4. Whisk together chicken stock, flour and milk. Pour unto skillet, bring to a boil and allow the sauce to thicken a bit. Stir in Parmesan cheese.

5. Add pasta to the skillet, along with the cooked chicken. Stir to combine.

6. Add the lemon juice, zest and red pepper flakes (if using). Stir until everything is well combined. Serve immediately with some awesome bread to soak up the sauce..you will not want to waste a drop!


Don't forget to follow A Little Bit of Cheer on Facebook HERE

Follow me on Instagram HERE

Follow any of my boards on Pinterest HERE 

Follow me on Bloglovin' HERE  

See where I link up HERE

 photo http___signaturesmylivesignaturecom_54493_88_9CE8AA3F49A05E87EC0C8AFE42F0194E_zps6da736d6.png

Friday, May 22, 2015

Crunchy Noodle Saad

Today I've got the perfect little summer side salad for you! It's a pretty popular recipe--some people call it "Ramen Noodle Salad" and there are tons of different versions of it, but this is mine :)

This recipe is the perfect backyard BBQ dish or great for a picnic since there is no mayo--just toss the salad with the dressing up to 30 minutes before serving.

Crunchy Noodle Salad
(serves 4-6--double for a crowd)

Salad ~ 
1 packet dry Ramen noodles (discard spice packet)
1 bag (about 10 oz) bagged coleslaw mix
1/2 cup slivered almonds
3-4 scallions, diced
1 can mandarin oranges
1/2 cup cilantro, chopped
1/2 to 1 cup shelled edamame (I used the frozen kind, thawed)

Dressing ~

1/3 cup honey
1/3 cup white wine or rice wine vinegar
1 tablespoon soy sauce
1 teaspoon sesame oil
1/4 cup olive oil (or less)
Salt and Pepper to taste
Red pepper flakes (optional)

1. Whisk together dressing ingredients, season to taste and set aside.

2. Preheat oven to 400. Crunch up the ramen noodles until they are in small pieces. On a cookie sheet, toss noodles together with the slivered almonds. Bake for 3-4 minutes until toasted and golden brown.
Lazy Girl Note ~ Skip this step if you are in a hurry...but I will say it adds an awesome layer of flavor!

3. In a large bowl toss together remaining salad ingredients; add toasted noodles and almonds.

4. Toss with dressing and chill for 15-30 minutes or serve immediately.

I served this salad with just a grilled chicken breast that I brushed with a little teriyaki sauce.

Crunchy Noodle Salad

Dinner is served!!!!

 photo http___signaturesmylivesignaturecom_54493_88_9CE8AA3F49A05E87EC0C8AFE42F0194E_zps6da736d6.png
Don't forget to follow A Little Bit of Cheer on Facebook HERE

I'm on Instagram now! Yippeee! Follow me HERE

Follow any of my boards on Pinterest HERE 

Follow me on Bloglovin' HERE 

Friday, May 8, 2015

Foodie Friday Faves

Happy Friday!!!! Oh, and dear Lord, I am GLAD it's FRIDAY!!!!!! This week has been, um...interesting. It always is when your entire family of 5 is hit with the stomach flu!! #shootmenow. Needless to say, there was not a lot of eating going on in this house this week!

I had a few new recipes to test this week and CLEARLY never got to it!!! So instead of leaving you high and dry, I'll leave you with a few of my (slightly summer-themed) favorite recipes. If you are new to this blog, you probably haven't seen most of these. I hope you enjoy and I'll be back on the wagon next Friday!! ~ XO

1. Backyard BBQ Corn Salad ~ This is a slightly modified version from one of my favorite bloggers, Mix and Match Mama. It's soooo good and perfect for summer!!


2. Grilled Chicken Quesadillas ~ Tastes just like the yummy goodness from a chain restaurant but whole lot healthier!


 3. Ham & Swiss Cuban Panini ~ I've never met a panini I didn't like and this one is no exception!


4. Bacon and Corn Pasta: This is so good. You have to make it. That is all.


5.  Avocado Chicken Salad: This is a great, healthy twist on traditional chicken salad. I love it stuffed in a pita, wrapped in a tortilla or just eat it with chips!


Don't forget to follow A Little Bit of Cheer on Facebook HERE

I'm on Instagram now! Yippeee! Follow me HERE

Follow any of my boards on Pinterest HERE 

Follow me on Bloglovin' HERE 

 photo http___signaturesmylivesignaturecom_54493_88_9CE8AA3F49A05E87EC0C8AFE42F0194E_zps6da736d6.png

Friday, April 3, 2015

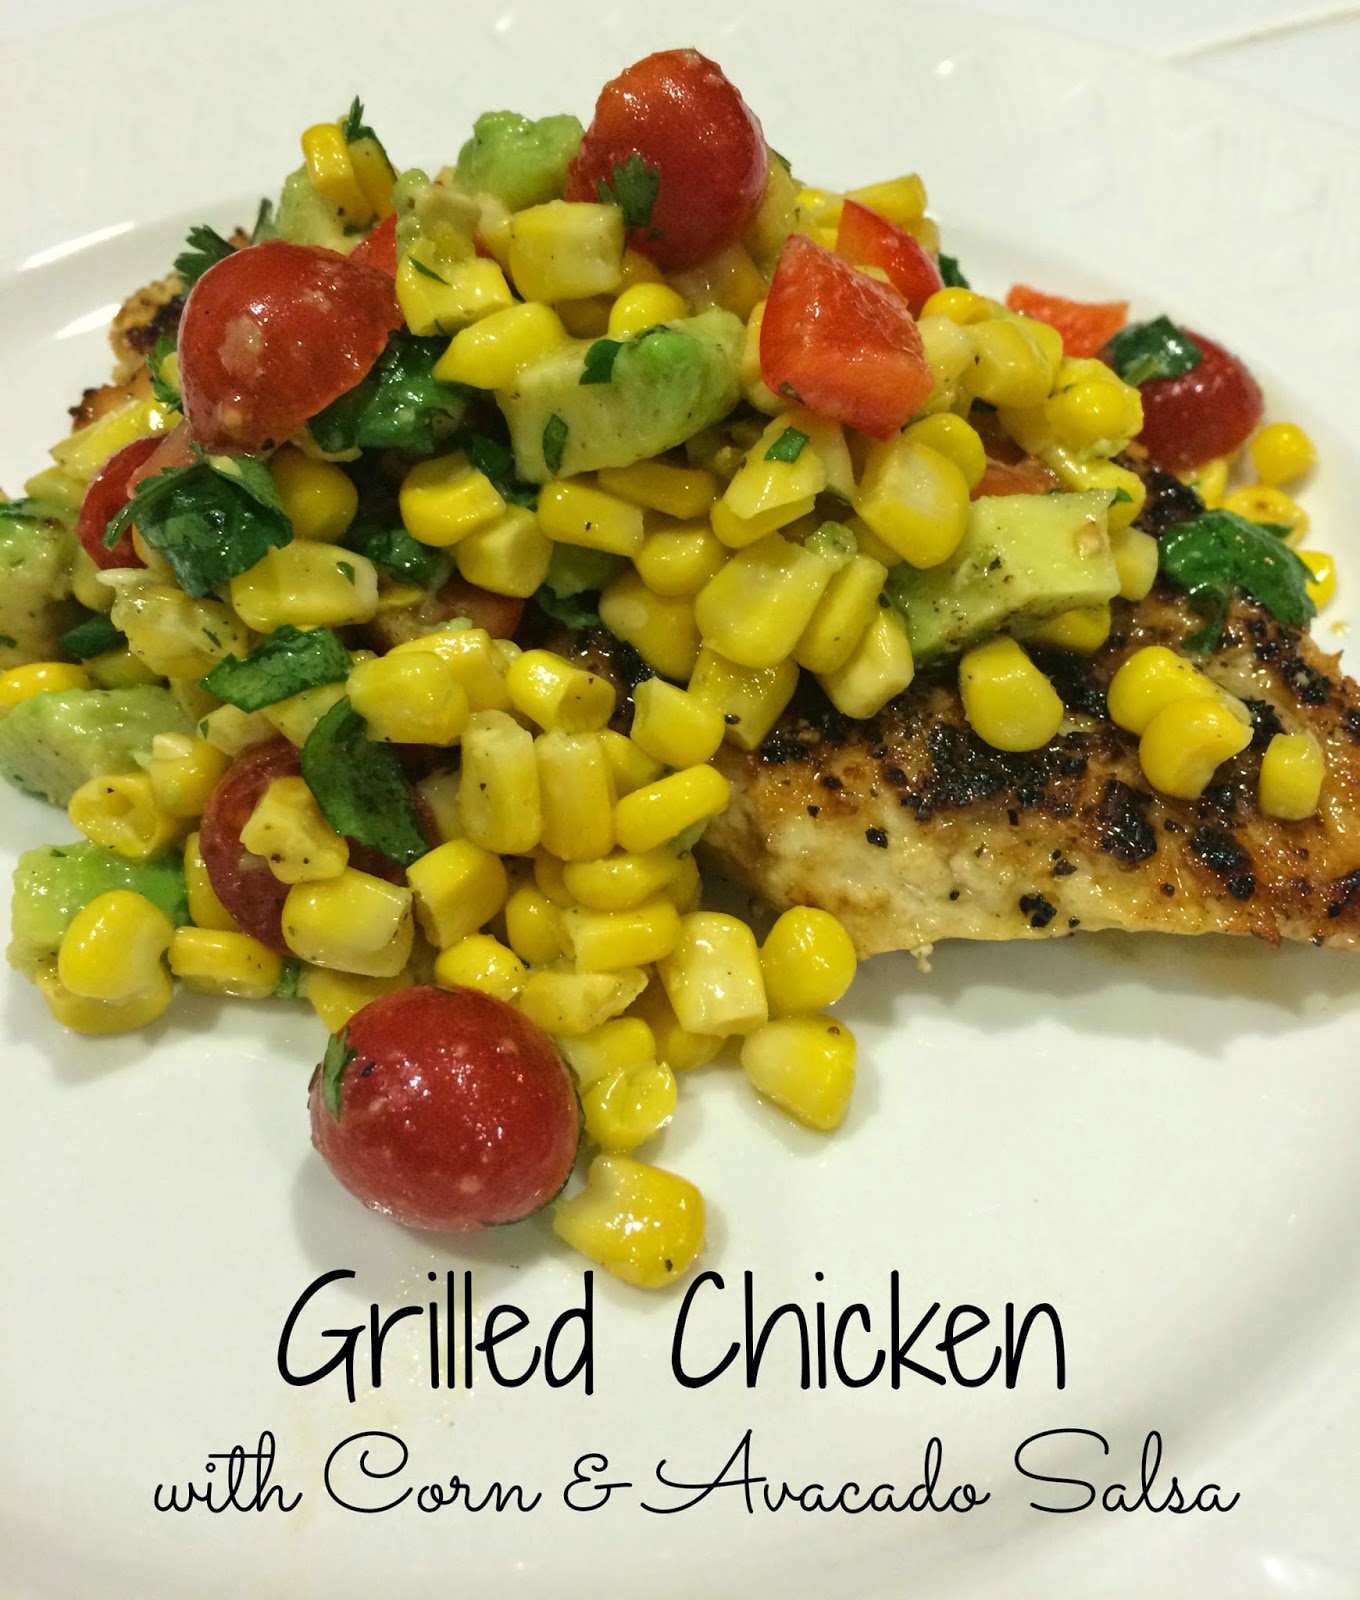
Foodie Friday ~ Grilled Chicken with Corn & Avocado Salsa


Now that the weather is starting to get nice and warm, all I can think about is grilling. I can also only think about the fact the swimsuit season is right around the corner! So come this time, I start wanting some super figure-friendly meals...STAT!

This is one of our faves--you can make it year-round of course, just use an indoor grill or skillet to cook the chicken (you can use my faux-grilled chicken method HERE).

Grilled Chicken with Corn and Avocado Salsa Recipe

Grilled Chicken with Corn & Avocado Salsa
(serves 2, can be easily doubled!)

2 boneless, skinless chicken breasts, pounded out a bit so they are an even thickness
2 cups frozen, thawed corn kernels (canned is OK, too)
1/2 pint cherry tomatoes, cut in half
1/2 cup chopped cilantro
Juice of 2 limes
1 avocado, diced
Pinch of sugar
1 tablespoon olive oil
Plenty of kosher salt and pepper

1. To make the salsa: Toss together all ingredients except the chicken. :) Season well with salt/pepper to taste. Refrigerate for a half hour (up to a few hours) to allow the flavors to marry.

2. Heat outdoor grill to medium high. Season chicken well with salt and pepper. Grill 4-6 minute per side (depending on how thick the chicken is) or until the juices of the chicken run clear. If grilling indoors, use my faux grilling method. 

3. Top chicken with Corn & Avocado salsa.

Summer on a plate!!!! Bathing suit weather, here we come!!!


Don't forget to follow A Little Bit of Cheer on Facebook HERE

I'm on Instagram now! Yippeee! Follow me HERE

Follow any of my boards on Pinterest HERE 

Follow me on Bloglovin' HERE 

 photo http___signaturesmylivesignaturecom_54493_88_9CE8AA3F49A05E87EC0C8AFE42F0194E_zps6da736d6.png

Thursday, February 26, 2015

FOODIE FRIDAY ~ BRUSCHETTA CHICKEN

Warmer weather is on the way! For me, that means tucking away my soup and stew recipes and busting out the lighter, healthier recipes. In the summer, we love eating Italian bruschetta with a nice salad on the side. It's a perfect light, summertime meal. This version is slightly heartier and served over a grilled chicken breast. If you can't grill outside, check out my method for faux-grilling chicken breasts indoors.

I serve this chicken with a small side of thin spaghetti tossed with Gina Rispoli Tomato-Basil sauce and about a 1/2 cup of grated Parmesan cheese.  It's honestly the perfect little "Italian meal." Buon Appetito!

Bruschetta Chicken Recipe

Bruschetta Chicken
2-4 boneless, skinless chicken breasts
5-6 plum tomatoes, diced
1 teaspoon balsamic vinegar
1 teaspoon salt, or more to taste
1 garlic clove, finely minced
1/2 cup chopped basil leaves
A drizzle of extra virgin olive oil
Fresh ground pepper, to taste

1. To make Bruschetta, toss together tomatoes, balsamic vinegar, garlic, salt and pepper. Drizzle with olive oil (i usually use a few teaspoons). Cover and refrigerate for about 30 minutes or up to overnight to allow flavors to marry.

2. When you are ready to serve, grill chicken breasts on an outdoor grill or using my faux-grilling method. 

3. Toss basil in with the bruschetta. Top chicken breasts with bruschetta mixture and you're ready to eat!!!

Such an easy, light meal! Enjoy!!!

XO ~ Casey

Wednesday, September 3, 2014

Recipe Wednesday: Grilled Chicken Quesadillas

This might be one of my favorite dinners...ever! Cheese, veggies, protein and a nice tortilla..it's basically all the food groups on one plate! It works great with leftover grilled chicken and if you have it, this comes together in about 15 minutes.

Grilled Chicken Quesidillas

*makes 3 large quesadillas

6 medium sized tortillas
1 red bell pepper, sliced
1 green bell pepper, sliced
1/2 an onion, sliced
1 grilled chicken breast or 1 faux grilled chicken breast (click to see my method)
Taco seasoning or Cajun seasoning
2 cups of your favorite cheeses, grated (i love using sharp cheddar and monterey jack)
Cooking spray/olive oil

1. Slice grilled chicken into strips and set aside (i like to season my chicken with taco seasoning or Cajun seasoning for this recipe). In a large skillet, heat a little oil and add sliced peppers and onions and cook about 5-7 minutes until the veggies are slightly soft; set aside.

3. Heat a griddle, grill pan or large skillet; spray tortillas with cooking spray or brush lightly with oil.

4. Top each tortilla with a layer of cheese, chicken, veggies and more cheese (don't make it tooo fat!). Place another tortilla on top and place on the griddle. Repeat until you have 3 quesadillas.

5. Cook each quesadilla until golden brown on each side (about 2-4 minutes on each side).

6. Cut into triangles and serve with sour cream, salsa and avocado!

This tastes like something you would order as an appetizer at a chain restaurant but whole lot healthier!! You can swap out the veggies, use a different meat and mix up the cheeses--customize it to whatever you like. This would also be great as a vegetarian meal. Enjoy!

~XO,
Casey


Wednesday, July 23, 2014

Recipe Wednesday: Salads Part 1

In the summer, I love having "salad night." Here are two salads that are quick, easy and delicious! These salads are meant to be main course salads. Later, I'll share my favorite "on the side" salads.

Although I make my own dressing quite often, these two salads call for dressings that I can't make nearly as good as the bottle :) They are the Giard's brand dressings and I get them at Safeway--which is affiliated with Vons, Dominicks, Tom Thumb, Carrs and Randalls--so you should be able to buy it at any of these stores! They often go on sale for Buy 1, Get 1 Free, so that's when I stock up.

Salad 1: Chicken Caesar Salad--This is Brookey's all-time favorite dinner. She LOVES this salad!!! The Caesar dressing is perfect and you can taste the lemon in it, which is rare in bottled dressings.


Chicken Caesar Salad
- Several cups of chopped romaine lettuce
- 1-2 cups of poached chicken (click here to see my post on cooking chicken)
- Juice of one lemon
- 1 cup croutons (store bought or homemade, I do both depending on the time I have!)
- A few tablespoons Girard's Caesar Salad dressing (see below)

Optional Ingredients
- 2 roma tomatoes, chopped
- Black olives, sliced
- Parmesan cheese, grated

This dressing is the KEY ingredient!!


1. Shred chicken and toss with about 1 tablespoon of dressing; set aside.

2. Chop lettuce, place into a large bowl and pour the juice of 1 lemon over the top of the lettuce (the lemon is optional but gives the salad an extra fresh kick!)

3. Top lettuce with croutons, tomatoes/olives/Parmesan (if using).

4. Toss salad with a few tablespoons of dressing, add in the chicken and you're ready to eat!


Salad 2: Chinese Chicken Salad--I'm not sure if there is really anything "Chinese" about this salad but the dressing bottle DOES mention it, so I'm just going with it :) All I know is that it's delicious!

Chinese Chicken Salad
- Several cups of chopped romaine lettuce
- 1-2 cups of poached chicken (click here to see my post on cooking chicken)
- 1 red bell pepper, chopped
- 1/2 cucumber, chopped
- 1 can mandarin oranges (chopped fresh oranges work, too but more work for you!) :)
- 1 handful dry Chow Mein noodles (in the Asian aisle...they add a great crunch!)
- A few tablespoons of Girard's Chinese Chicken Salad dressing

Here's the KEY INGREDIENT:


1. Shred chicken and toss with about 1 tablespoon of dressing; set aside.

2. Combine all other ingredients, add in the chicken and toss with a few more tablespoons of dressing. That's all she wrote :)

If you poached a bunch of chicken per my crockpot method, these two dinners literally come together in minutes!

Enjoy! XO


Wednesday, July 16, 2014

Recipe Wednesday: Thai Takeout

I loooove Thai food. Unfortunately, there are no great Thai restaurants close to us where I can grab a quick pad thai, curry or noodle dish. I love this recipe because I get my Thai fix, but it's quick and easy. Not to mention, I'm sure it's more healthy than take out. This recipe can be mixed and matched with any veggies you like, and it's great with chicken or shrimp, too!


Thai Vegetable Curry
- 1 can of unsweetened coconut milk (I usually use the "lite" version but I am telling you, the regular kind is MUCH tastier!)
- 3 teaspoons red curry paste (on the "Asian" aisle, see the brand I use below)
- 1 tablespoon fish sauce (key ingredient, can't skip it!)
- 1-2 teaspoons soy sauce
- 2 tablespoons of brown sugar
- 3 cups of veggies: Frozen peas, edamame, snap peas, corn, red bell pepper, green bell pepper, snow peas, sliced onion....sky's the limit!
 - Fresh basil


1. In a medium skillet, slowly warm coconut milk; whisk in red curry paste until dissolved.

2. Add in all other ingredients and stir until heated through.

Serve over white or brown rice, and top with fresh basil!

Does it get much easier than that? I didn't think so :)

Wednesday, July 9, 2014

Recipe Wednesday: Chicken Tacos

Happy Hump Day!

I try to do "Taco Tuesday" at my house each week. Which basically means some form of Tex-Mex, chips and salsa and avocado are involved! This is one of our favorite taco recipes!! It's super easy and healthy...and....it utilizes the poached chicken method from last week! I love how simple it is--very few ingredients, so it can be easily whipped up on a busy weeknight (which I have done several times)!


Chicken and Spinach Tacos
1/2 packet low sodium taco seasoning
1 1/2 cups of your favorite salsa (fresh is great if you have it--i tend to use just the regular jar salsa)
1 cup of frozen, chopped spinach (thawed)
1/2 cup water
1-2 cups of your favorite cheese (sharp cheddar and pepperjack are our faves)
6 "stand and stuff" taco shells


- Preheat oven to 300. Place taco shells in preheated oven for about 2 minutes or until barely crisp.

- Place shredded chicken, taco seasoning, salsa, spinach and water into a large skillet and simmer until flavors are combined (about 5 minutes).

- Spoon chicken mixture into warm taco shells and top with cheese.

- Place tacos back in the oven for about 5 more minutes or until cheese is melted (if you leave them in too long the bottoms will get soggy). You can also put them under a 450 degree broiler for a minute or so.

Done! You can eat them as-is or top with additional salsa, sour cream or avocado.  I love to serve this along side black beans and chips and salsa! Such an easy, easy meal....especially if you have the poached chicken on hand.

Ole to Taco Tuesday!

Wednesday, July 2, 2014

Recipe Wednesday: Method to the Madness

Chicken is probably the dinner ingredient I use the most often. I have so many yummy chicken recipes in my menu rotation that all use one of two EASY methods to get my chicken perfectly cooked.

The two methods are: Poaching and Faux-Grilling

After you have cooked your chicken using one of these two methods, there are so many ways to use it for super quick and easy recipes. Some of my favorites are, baked chicken tacos, burritos, chicken salad, Caesar salad, orange chicken sandwiches, buffalo chicken salad...recipes coming soon!!!

Here are the two extremely easy methods:

Poaching
I love this method because you poach IN THE CROCKPOT!! I especially love it in the summer when I don't want to get anywhere near the stove!

- Place uncooked chicken breasts in a crock pot (I typically do 4 at a time and use them for at least 2 different recipes)


- Fill the crock pot with just enough water to just cover the chicken. This is also a good time to use up the little bit of extra chicken stock you have sitting in the fridge waiting to go bad!! :)  Also, I don't use any salt or other seasoning so I can season it however I need to later.

- Cook on low for 4-6 hours or high for 2-3 hours until the chicken in fork tender and shreds easily.

- Shred chicken with two forks and store in an airtight container until you are ready to use it! Done!


Faux-Grilling
This method requires the stove but it's really easy, too!

- POUND OUT chicken breasts until they are an even thickness. I ALWAYS ALWAYS do this--it's hard to get an evenly cooked chicken breast if you skip this step. The thick part takes so much more time to cook, so you end up with one side cooked and one side dry. Not good. Plus, pounding out the chicken cuts the cooking time way down.

- Coat a grill pan or iron skillet with olive oil, season chicken with whatever seasonings you like. For a "base" I just use salt and pepper--then I can season it later however I need to. (of course, at this point you can always throw the chicken on the "real" BBQ grill, too!)

- Cook chicken for at least 2-3 minutes on the first side OR until the side is golden brown. Do not flip or touch the chicken until this happens. Flip and cook on the other side for another 2-3 minutes or until cooked through.

From these two methods, sky's the limit on recipes you can use them for! Stay tuned for my faves!

Quick and Easy Meal Prep for Breakfast + Lunch + Snacks!

Ready for a SUPER quick and easy meal prep?! No joke, it took me longer to find all the lids to these containers than it did it prep my b...